Thursday, November 14, 2013
Holiday Card Workshop 2013 Day 2
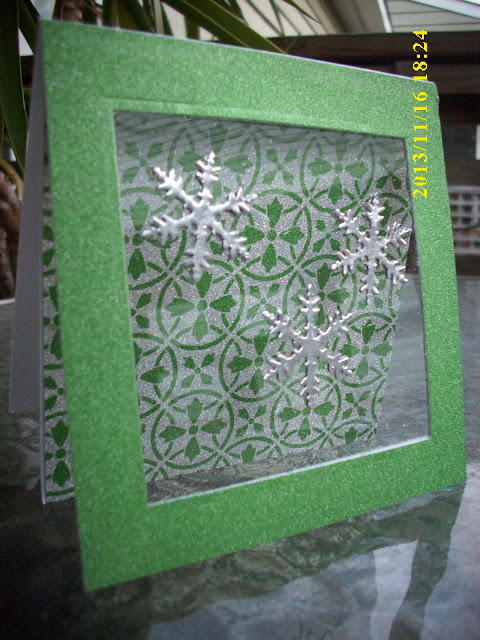
For the second day of the Holiday Card Workshop, we learned how to "suspend" snowflakes on our cards. Stephanie Klauck provided a video on three different ways to do it, and here are my takes on two of them. The picture above shows the snowflakes dangling in open space, connected by fishing wire that's adhered on the top and the bottom of the square. I added a small frame around the square for appearances.
The below shows you how I glued the snowflakes on a clear transparency, both front and back, so they appear to be in mid-air on the card. I added an extra piece on the inside with the designer paper on one side that opens to blank paper on the other side so you have a place to write a message.
Here's another card I've added that's just like the first one, but different paper:
Thank you for stopping by! I enjoy your comments very much--they motivate me to keep going, even on the most challenging days of class!
Subscribe to:
Post Comments (Atom)


Glad to see you again. Pretty card. That technique looked like a tough one to me.
ReplyDeleteThese are wonderfully crafted!
ReplyDeleteLove how these turned out! Great job! Aren't they fun?!
ReplyDeleteBeautiful job! I wish I had more time to try these techniques too...your coordinating papers are so pretty with the silver snowflakes!
ReplyDeleteWOW. WOW. WOW!
ReplyDeleteGreat cards!
ReplyDeleteOh WOW!! beautiful. It's impossible to decide which one is my favorite...guess I'll just have two favorites
ReplyDeleteGreat job!!!
ReplyDeleteso pretty...great idea...
ReplyDeleteGreat job on these fabulous cards!
ReplyDeleteWauw, Sharon, you've been a busy gal making all those cards. Good work!
ReplyDeleteThese look brilliant and love the different colours, the green is lovely!
ReplyDelete